Navigation BarS2C Home « Navigation Bar
One of the most important areas of website design is allowing users easy navigation to the other content on our site. In this lesson we create a navigation bar for our homepage for this purpose. Using the relevant section of the proposal and the Fine Fancy Foods Layout Diagram we can see what the client wants with regards to this part of the site. With this information acquired we can create the navigation bar, using CSS and HTML.
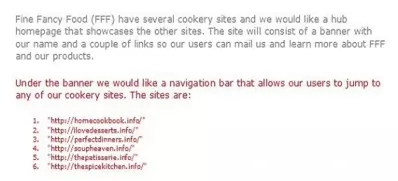
Fine Fancy Food's Website Proposal Revisited
Areas that affect the navigation bar are highlighted in red.

Deciphering our highlighted text
Ok, let's go through our highlighted text and see what we can learn from the website proposal with regards to our navigation bar.
Under the banner we would like a navigation bar that allows our users to jump to any of our cookery sites. The sites are:.
There is no mention of placement here so lets revisit the diagram Fine Fancy Foods sent us.

Creating Our Layout
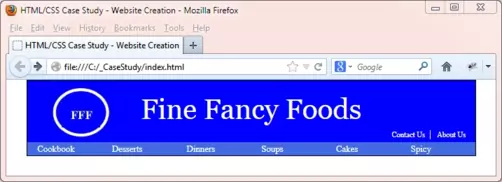
Well from the diagram the navigation bar sits under the banner and the links seem to be evenly spaced.
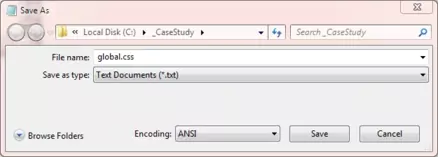
Reopen up the file with Notepad we updated in Lesson 3: Website Banner for our global CSS.
You saved the file to your computer in the C:\_CaseStudy folder as global.css
Copy and paste the following code into the reopened file, overwriting the existing #nav style.
/* Style nav bar */
#nav {
  margin: 0;
  padding: 0;
  line-height: 1;
  width: 100%;
}
/* Style list */
#nav ul {
  list-style: none;
}
/* Style list items */
#nav li {
  background-color: #4169e1;
  float: left;
  width: 160px;
}
/* Style Links */
#nav a {
  color: white;
  margin: 0;
  padding: 5px 22px 5px 22px;
  font-weight: 500;
  font-size: 1.2em;
  display: block;
  text-decoration: none;
}
/* On hover */
#nav a:hover{
  color: red;
}
Save the file in the C:\_CaseStudy folder and close the Notepad.

Reviewing The CSS
We styled the #nav division with CSS properties you should be familiar with by now. We then style the unordered list so no bullet points appear. After this style the list items with a background color of royal blue (#4169e1) and float the items left. As we are using a 960 grid and we have six list items we can make each list 160 pixels wide to full the entire width of the screen (160x6 = 960). Lastly we style the links and set a new colour for when the mouse hovers over a link.
Creating Our HTML
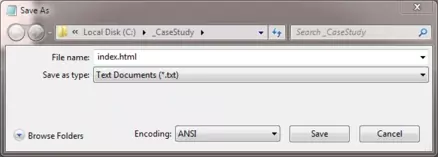
Reopen up the file with Notepad we updated in Lesson 3: Website Banner.
You saved the file to your computer in the C:\_CaseStudy folder as index.html
Copy and paste the following code into the reopened file, between the opening <div id="nav"> and closing </div> element.
<ul>
  <li><a href="http://homecookbook.info/">Cookbook</a></li>
  <li><a href="http://ilovedesserts.info/">Desserts</a></li>
  <li><a href="http://perfectdinner.info/">Dinners</a></li>
  <li><a href="http://soupheaven.info/">Soups</a></li>
  <li><a href="http://thepatisserie.info/">Cakes</a></li>
  <li><a href="http://thespicekitchen.info/">Spicy</a></li>
</ul>
Save the file in the C:\_CaseStudy folder and close the Notepad.

Viewing Our Saved File
From the C:\_CaseStudy folder, double click on the saved file and it will appear in your default web browser and look something like the following image.

Reviewing The Code
The HTML is simply an unordered list and we did most of the work when we styled the tags with CSS. Just make sure you understand the CSS and HTML we used before going on to the next lesson.
Lesson 4 Complete
In this lesson we have reviewed the proposal and retrieved information to create a navigation bar for the site as requested by the client.
Related Tutorials
HTML Basic Tutorials - Lesson 6 - Ordered and Unordered Lists
HTML Basic Tutorials - Lesson 8 - Links
HTML Intermediate Tutorials - Lesson 2 - HTML Structure - Layout
CSS Basic Tutorials - Lesson 5 - Styling Text
CSS Basic Tutorials - Lesson 8 - Padding & Margins
CSS Basic Tutorials - Lesson 9 - Borders
CSS Intermediate Tutorials - Lesson 1 - Backgrounds
CSS Intermediate Tutorials - Lesson 2 - A Final Look At The Box Model
CSS Intermediate Tutorials - Lesson 7 - Positioning
CSS Intermediate Tutorials - Lesson 8 - Display
CSS Advanced Tutorials - Lesson 3 - Styling Lists
What's Next?
In the next lesson we extract the information from the proposal that is relevant to the main content.