Programmatic SecurityS2C Home « Programmatic Security
In the last lesson we looked at securing our web applications using declarative security where no coding was required. The downside of solely using declarative security is that the login form created for authentication by the browser cannot be altered and may not be suitable for client facing services. In this lesson we will take a much more detailed look at FORM authentication which allows us to secure our web applications using a combination of HTML or JSP pages in combination with DD elements, to create bespoke login forms that can be presented as front ends to our clients.
We will then look at coding security within our servlets using the Servlet Security API which is a set of methods contained within the HttpServletRequest interface.
FORM Authentication RevisitedTop
The declarative mechanics for Form-based authentication were explained in the FORM Authentication section of the Declarative Security lesson so we won't repeat these here. Suffice to say that this type of authentication allows us to customize the appearance of a login page that is customer facing and we also have to include an error page; both pages can be HTML or JSP pages. On initial entry to a constrained resource using FORM authentication the login page is displayed and if the login is successful the constrained resource is sent, otherwise the user is sent the error page.
There are three steps involved when using FORM authentication as detailed below:
- Declare the <login-config> top-level element and its sub-level elements for FORM authentication.
- Create a HTML or JSP page for the login page.
- Create a HTML or JSP page for the error page.
So how does the container communicate with the login page to authenticate user input to the form? For a HTML form, which is used in the example below, this is achieved using the following rules:
- The HTML form used for the login page must use the POST method.
- The HTML form must have "j_security_check as its action".
- The HTML form must include an input field for a username called "j_username".
- The HTML form must include an input field for a password called "j_password".
Example Of FORM AuthenticationTop
Ok lets have a look at using FORM authentication to authenticate user entry. To achieve this we will use the bookchoice web application we developed in the Session Management Part 3
lesson and change the DD within the deployed web application. We will also need to develop bespoke login and error HTML pages.
If you didn't do so in the last lesson change and save the tomcat-users.xml file by removing all the comments and uncommenting the file as below. In my case the tomcat-users.xml file can be found in:
C:\apache-tomcat-6.0.37\conf
<?xml version='1.0' encoding='utf-8'?>
<tomcat-users>
  <role rolename="tomcat"/>
  <role rolename="role1"/>
  <user username="tomcat" password="tomcat" roles="tomcat"/>
  <user username="both" password="tomcat" roles="tomcat,role1"/>
  <user username="role1" password="tomcat" roles="role1"/>
</tomcat-users>
Coding The DDTop
Go to your Tomcat installation for the the bookchoice web application, which in my case is:
C:\apache-tomcat-6.0.37\webapps\bookchoice\WEB-INF
Within the WEB-INF folder open up the web.xml file for editing and cut and paste the following XML, replacing the existing contents.
<?xml version="1.0" encoding="UTF-8"?>
<web-app xsi:schemaLocation="http://java.sun.com/xml/ns/javaee
                             http://java.sun.com/xml/ns/javaee/web-app_2_5.xsd"
         xmlns:xsi="http://www.w3.org/2001/XMLSchema-instance"
         xmlns="http://java.sun.com/xml/ns/javaee" version="2.5">
   <servlet>
      <servlet-name>bookWishList</servlet-name>
      <servlet-class>controller.WishListServlet</servlet-class>
   </servlet>
   <servlet-mapping>
      <servlet-name>bookWishList</servlet-name>
      <url-pattern>/book</url-pattern>
      <url-pattern>/bookDetails</url-pattern>
      <url-pattern>/wishList</url-pattern>
   </servlet-mapping>

   <security-constraint>
      <web-resource-collection>
         <web-resource-name>ViewBooks</web-resource-name>
         <url-pattern>/</url-pattern>
         <http-method>GET</http-method>
      </web-resource-collection>

      <auth-constraint>
         <role-name>tomcat</role-name>
         <role-name>role1</role-name>
      </auth-constraint>
   </security-constraint>

   <security-role>
      <role-name>tomcat</role-name>
      <role-name>role1</role-name>
   </security-role>

   <login-config>
      <auth-method>FORM</auth-method>
      <form-login-config>
         <form-login-page>/login.html</form-login-page>
         <form-error-page>/error.html</form-error-page>
      </form-login-config>
   </login-config>
</web-app>
Save the web.xml file in the WEB-INF folder.
Coding The Login PageTop
Now we need to code a login in page which can be in HTML or JSP and as we haven't learnt about JSP yet we will be using HTML for this.
<!DOCTYPE html>
<html><head><title>Custom Login Form</title></head>
  <body>
    <h1>Custom Login Form</h1>
    <form action='j_security_check' method='post'>
      <fieldset style='background-color:silver;border:1px solid black;
        padding:5px;text-align:left;width:300px;'>
        <legend>Custom Login Form</legend>
        <br>Username: <input type='text' name='j_username'>
        <br><br>Password: <input type='password' name='j_password'>
        <br><br><input type='submit' value='Submit'>
        <input type='Reset'>
      </fieldset>
    </form>
  </body>
</html>
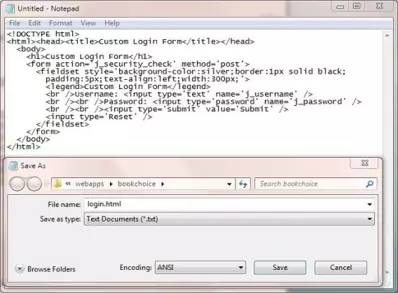
Saving The Login Page
Ok, with Notepad or a simlilar text editor cut and paste the above HTML.
Click file from the toolbar and then click the save option.
In the Save in: tab at the top make sure you are pointing to the C:\apache-tomcat-6.0.37\webapps\bookchoice folder.
FORM authentication pages are relative to the application root so should be saved at the application root and not in the WEB-INF folder.
In the File name: text area type login.html and then click the Save button and close the Notepad.
Coding The Error PageTop
The last thing we need to do is code an error page for when a user types in an invalid username/password combination.
<!DOCTYPE html>
<html><head><title>Custom Error Page</title></head>
  <body>
    <p><strong>You entered an invalid username or password.</strong></p>
  </body>
</html>
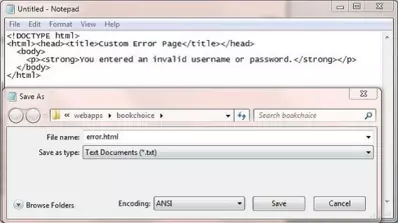
Saving The Error Page
Ok, with Notepad or a simlilar text editor cut and paste the above HTML.
Click file from the toolbar and then click the save option.
In the Save in: tab at the top make sure you are pointing to the C:\apache-tomcat-6.0.37\webapps\bookchoice folder.
FORM authentication pages are relative to the application root so should be saved at the application root and not in the WEB-INF folder.
In the File name: text area type error.html and then click the Save button and close the Notepad.
Testing Our ServletTop
Open a command prompt and change the directory to the location of our Tomcat bin directory and then type in startup (Windows 7) or startup.sh (Linux/Unix/OSX).
Press Enter and the Tomcat server should open up in a new window.
You can also start up Tomcat by double-clicking the startup batch file within your Tomcat /bin folder.
With Tomcat up and running type the following into your web browser address bar and press enter:
http://localhost:8080/bookchoice/book
The following screenshot shows the results of typing the above into the Firefox web browser address bar and pressing enter.

As you can see the browser has popped up our custom authentication screen for us to enter a username and password in. Aesthetically this login screen is even less appealing than the one that comes with the browser but is enough for you to see how FORM authentication works.
To enter the application type in role1 or tomcat in the Username: field and tomcat in the Password: field and press enter. You
will then be able to use the application as you are now authenticated.
The following screenshot shows the error.html page which results from typing an invalid Username/Password combination in.

Servlet Security APITop
There are several methods within the HttpServletRequest interface we can use for hard coding security within our servlets and these are listed in the table below.
| Method Declaration | Description |
|---|---|
java.lang.String getAuthType() | Returns the name of the authentication scheme used to protect the servlet or null if no security constraint has been applied to the servlet. |
java.lang.String getRemoteUser() | Returns the login of the user making this request or null if the user has not been authenticated. |
java.security.Principal getUserPrincipal() | Returns a java.security.Principal object containing the name of the current authenticated user or null if the user has not been authenticated. |
boolean isUserInRole( java.lang.String role) | Returns a boolean indicating whether the authenticated user belongs to the specified role. |
Of the above methods the most commonly used programmatically is the isUserInRole()method which can be used after a user has been authenticated to check that the user belongs within a certain role. This allows
us to use finer grained control within the service methods that become available after authentication. For example within the the doGet() method we can check the role and render a page appropriate to the
role. The following code snippet shows an example of using the method:
     public void doGet(HttpServletRequest request, HttpServletResponse response)
            throws ServletException, IOException {
        if request.isUserInRole("Admin") {
           // Display Admin page
           ...
        else {
           // Display Member page
           ...
        }
    }
Of course there may be no correalation between the roles entered by the coder and those used in the DD or we may have inherited code from someone else that doesn't fit with the roles in use. So how do we get around this, do we have to change all the hard-coded roles to match those within the DD? Luckily for us we can use the <security-role-ref> sub-level element of the <servlet> element within the DD to map roles within a servlet to those declared within the DD.
The following DD snippet shows how to map the "Admin" role used above to the "tomcat" role we have used before.
<?xml version="1.0" encoding="UTF-8"?>
<web-app xsi:schemaLocation="http://java.sun.com/xml/ns/javaee
                             http://java.sun.com/xml/ns/javaee/web-app_2_5.xsd"
         xmlns:xsi="http://www.w3.org/2001/XMLSchema-instance"
         xmlns="http://java.sun.com/xml/ns/javaee" version="2.5">
   <servlet>
      <security-role-ref>
         <role-name>Admin</role-name>
         <role-link>tomcat</role-link>
      </security-role-ref>
      ...
   </servlet>
   ...
   <security-role>
      <role-name>tomcat</role-name>
      <role-name>role1</role-name>
   </security-role>
   ...
</web-app>
Lesson 7 Complete
In this lesson we looked at securing our web applications programmatically.
What's Next?
That's it for the Servlets section of the site, in the next lesson we Start our exploration of jsp.