Getting StartedS2C Home « Getting Started
In our first lesson on Java we download the latest JDK from the Oracle site and setup our environment. We then check that everything is working as it should by running a check to see if the Java compiler can be accessed from the command line.
Getting The Java Development Kit (JDK) Top
Ok, before we delve into Java we need a Java JDK. The JDK contains everything we need to compile and run our Java programs. We will be using Java Standard Edition for these lessons and so the first thing we need to do is download the latest SE version of the Java 8 JDK. The latest version at the time of writing was Java SE 8u291. The download page can be found at this link Oracle JDK Download, just scroll down to the Java SE 8 section and click on the 'JDK Download' link. The JDK includes the Java Runtime Environment (JRE) which you must have on your system to run Java applications. The JRE includes the JVM and some other library files and as such creates a JVM to run our Java applications at runtime.
The download comes in Windows, Linux, Mac, and Solaris flavours, just click on the appropriate JDK for your system after reviewing and accepting the Oracle license agreement. You will need to sign in to Oracle to complete the download, if you don't hava an existing Oracle account you will need to register for one. When you install the download you get the option of choosing where to put the JDK on your hard drive. I am just using the default directory provided by Oracle, which in my case on my Windows 10 system is C:\Program Files\Java\jdk1.8.0_291\. Where you put the JDK is up to you but remember the path for a bit later in this lesson. I also put the JRE in the default directory when prompted which in my case was C:\Program Files\Java\jre1.8.0_291.
Setting A Classpath For The Java Compiler Top
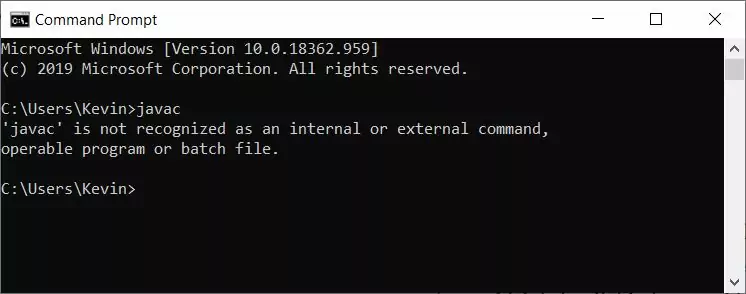
Now we have the JDK installed we need to add a classpath entry to the Path environment variable for where the Java compiler command (javac) resides. First lets open a command line prompt and type in javac. Below is a screenshot of what happens when we do this on my Windows 10 system.

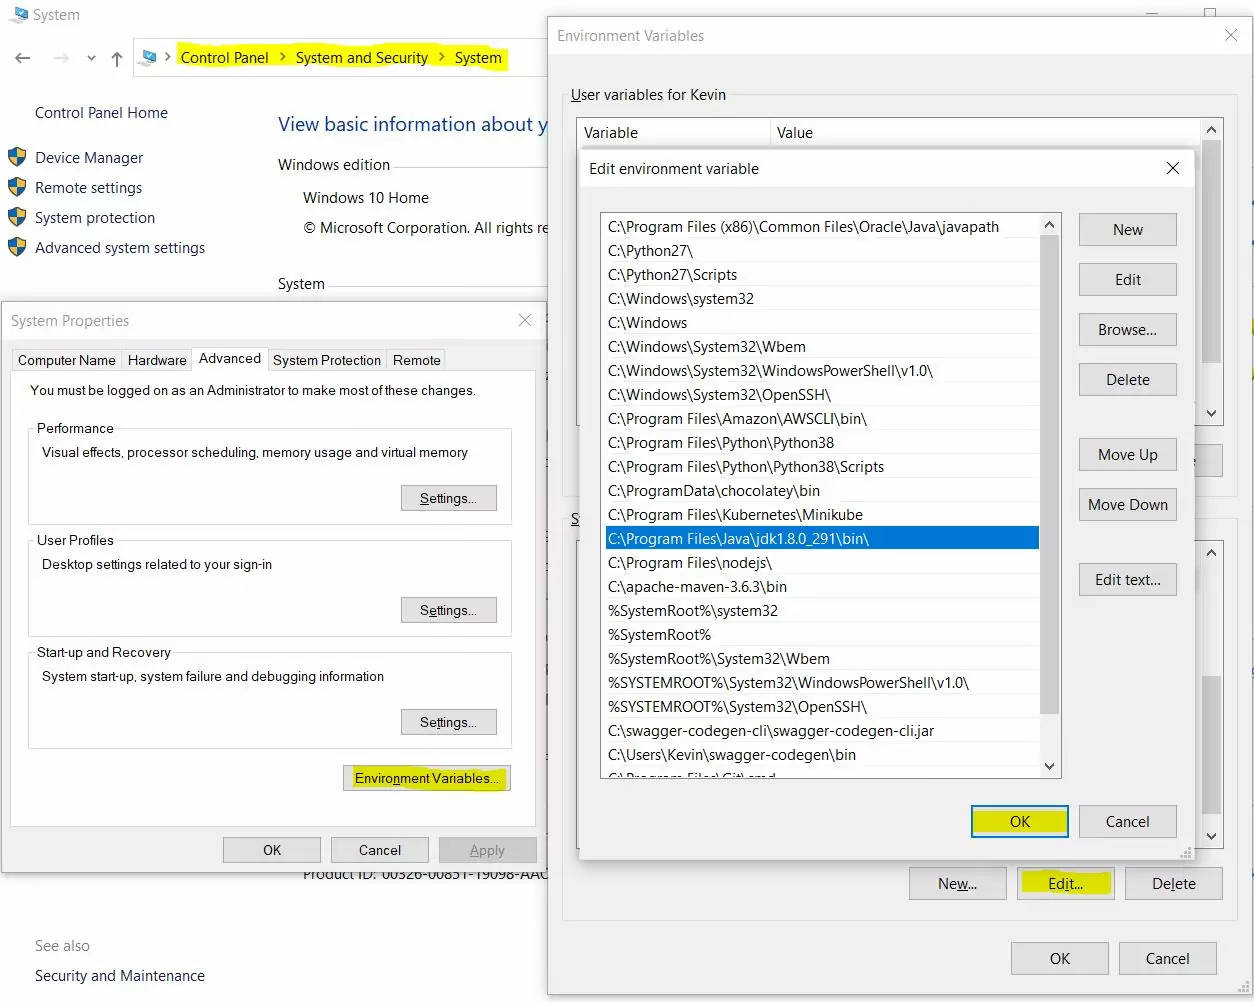
The javac command lies within the bin directory of the filepath where the JDK was installed which in my case is C:\Program Files\Java\jdk1.8.0_291\bin\ and so we need to add this classpath to our environment variables. Below is a screenshot of how this is achieved on my Windows 10 system and of course other OS will vary. But for Windows From Control Panel, select System and Security > System > Advanced System Settings and at the bottom of the window select Environment Variables. Edit the system variable "Path" and add C:\Program Files\Java\jdk1.8.0_291\bin\ (or whatever you selected as your filepath to the JDK) to the end seperating this classpath from the last with a semi-colon.

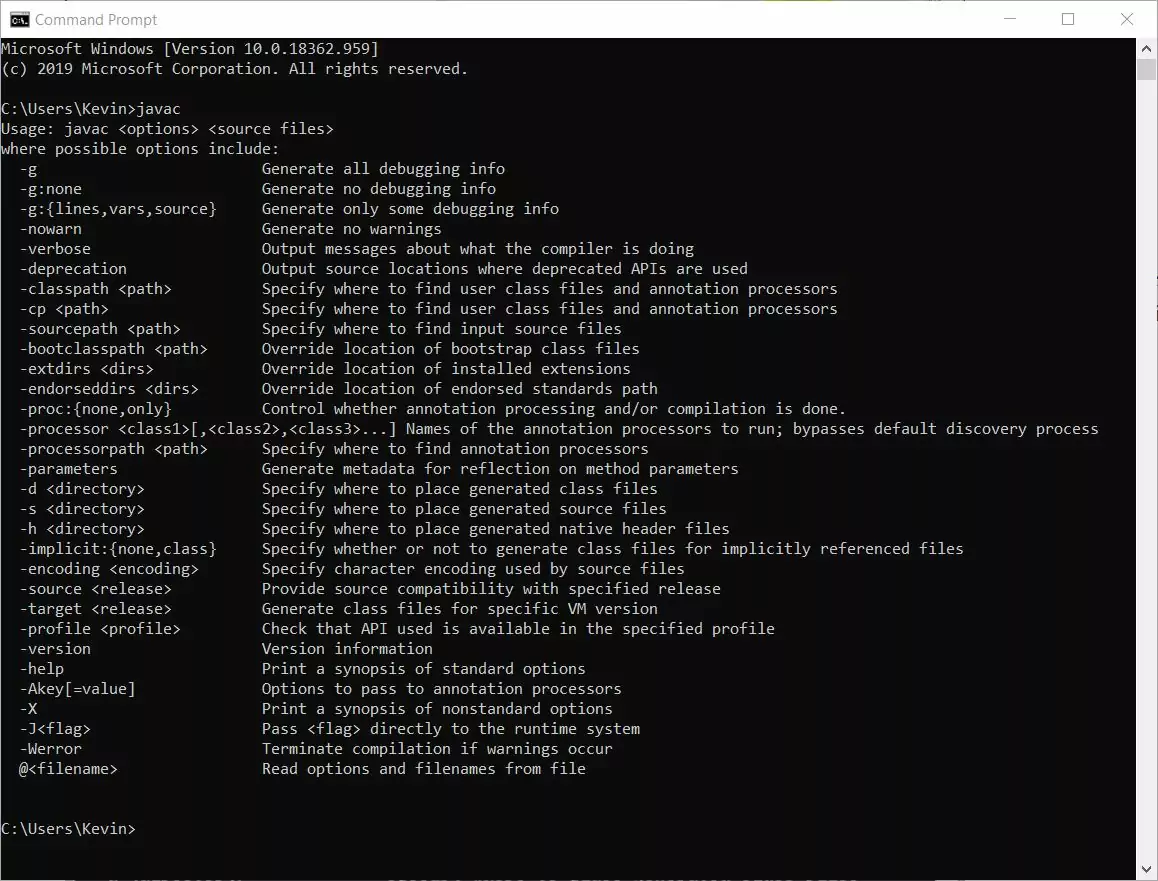
Once you have done this press OK on the windows to close them all and reopen the command line prompt and type in javac. Below is a screenshot of what happens when we do this on my Windows 10 system after adding the classpath. As you can see the javac command now brings up a list of options showing it is now on our classpath and can be used to compile our Java programs. If this doesn't work for you just recheck the steps above for setting the classpath and try again.

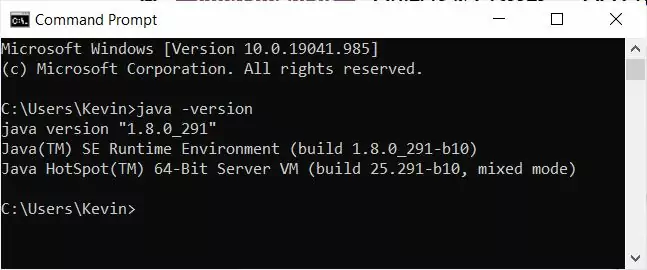
We can now check the Java version within the command line prompt as well. Type java -version at the command line and press enter.

Are We Going To Use An Integrated Development Environment? (IDE)
We will be using an IDE for developing and compiling programs in these lessons and there are many available including Eclipse, IntelliJ IDEA and NetBeans. We will get to choosing one when we create our first Java program in the next lesson.
The java.lang Package Top
Java comes with collections of classes which are held in namespaces known as packages. We can use these packages in our programs by using the import keyword followed by the namespace. We will talk about packages and how we import them in the Packages lesson of the API Contents section. For now and the next few sections of the site we will only be concerned with the java.lang package which is implicitly imported into all our Java programs for us.
Java Documentation Top
Java comes with very rich documentation that you will go back to time and again. The following link will take you to the online version of documentation for the Java™ Platform, Standard Edition 8 API Specification . I suggest adding this link to your browser's favourites toolbar for fast access.
Lesson 1 Complete
In this lesson we looked at the evolution of java and setting up our environment to begin coding.
What's Next?
Now we have the basic environment set up we can take a look at Java code structure and syntax. In the next lesson we will do just that and run our very first simple Java program.