AWT and Swing Libraries OverviewS2C Home « AWT and Swing Libraries Overview
In this lesson we introduce the Abstract Windowing Toolkit (AWT) and Swing libraries with an overview of those parts of these libraries we are interested in to create our own GUIs within java.
The original GUI builder in java was the AWT which acted as a wrapper around the graphical capabilities of the host platform which meant developers had to be aware of differences in the host platform when using widgets from the AWT library. The different widgets that make up a GUI are known as components in Java and each of these are represented in the AWT by a class. Creating GUI applications built solely with AWT is a cumbersome approach to front-end development and the end results to the user are often slow response times. The AWT was also criticised for going against the grain of Java's platform dependency. With this in mind the Swing library was developed to ease the pain of GUI development and encompasses a set of lightweight Java components with pluggable look and feel capabilities that where possible work the same on all platforms, which fits in with Java's kudos of platform dependency.
Using a combination of Swing components and classes from the AWT, for actions such as event handling, we can write GUI applications that are independent of the operating system used. Swing components generally
have the same name as the AWT components they derive from prefixed with a capital letter J.
AWT and Swing Class HierarchyTop
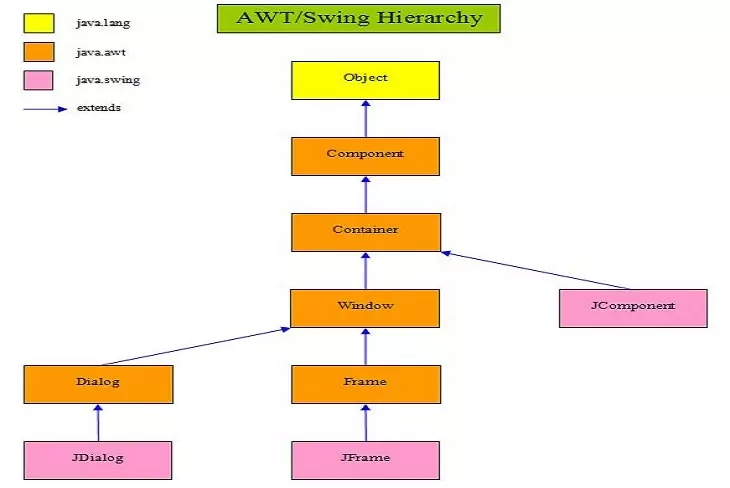
The AWT and Swing libraries hold a huge amount of interfaces and classes that we can't possibly hope to cover on the site. The following diagram shows the parts of the class hierarchy we will cover on this site for the purpose of learning how to create our own GUI applications.

AWT and Swing ClassesTop
The table below gives a description of each class within the above diagram.
| Class | Description |
|---|---|
Component | The abstract superclass that all concrete component subclasses are derived from. A component is an object having a graphical representation that can be displayed on the screen and that a user can interact with. |
Container | A container is a component that has the capability to contain other components. This allows us to group related components together within one place and is the reason why the JComponent class is derived from Container. |
Window | A top-level window with no borders or menubar that adds methods to the java.awt.Container class it extends that are specific to windows. |
Frame | A top-level window that adds borders and a menubar. |
JFrame | Extended version of the java.awt.Frame class that adds support for the Swing component architecture. |
Dialog | A top-level window with a title and a border typically used to take some form of input from the user. |
JDialog | Extended version of the java.awt.Dialog class that adds support for the Swing component architecture. |
JComponent | Base class for all Swing components except top-level containers. |
Look And FeelTop
Swing supports a pluggable look and feel of components by making their visual appearance the responsibility of an independent class called the UIManager. This means that by plugging in a
different look and feel we can alter the appearance of the components within our GUI without affecting any of the code. You can develop your own look and feel for components and the SDK
is distributed with several pluggable look and feel classes you can use and which we briefly discuss here.
The following program lists the look and feel classes that were distributed with the version of the JDK I downloaded for the site which at the time was Java SE 7u25 for a Windows 64 bit system.
import javax.swing.UIManager; // Look and feel manager

// Java look and feel classes
public class ListLookAndFeelClasses {

    public static void main (String[] args) {
        UIManager.LookAndFeelInfo[] landfs = UIManager.getInstalledLookAndFeels();

        for (UIManager.LookAndFeelInfo landf : landfs) {
            System.out.println(landf.getClassName());
        }
        System.out.println("Default cross platform Java look and feel class: "
                           + UIManager.getCrossPlatformLookAndFeelClassName());
    }
}
Compiling and running the program lists the following look and feel classes for use on my machine.

The first two classes in the screenshot above prefixed with javax.swing.plaf, correspond to the Java look and feel, are platform independent, intended to run on all platforms and are guaranteed to be in any SDK downloaded.
The third class in the screenshot above prefixed with com.sun.Java.swing.plaf.motif, correspond to the Motif look and feel and is intended to run on Unix platforms.
The fourth and fifth classes in the screenshot above prefixed with com.sun.Java.swing.plaf.windows, correspond to the Windows look and feel and are intended to run on Windows platforms.
Apart from the first two classes there is no guarantee what look and feels are provided for downloads of the Java SDK for different operating systems. So if you want your look and feel to work independently of the platform it is running on then the first two classes are what you have to choose from.
The final line in the screenshot shows the LookAndFeel class that implements the default cross platform Java look and feel.
Setting The Look And FeelTop
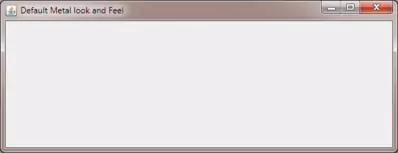
We can also set the look and feel to a custom skin or to one of the look and feel classes distributed with the SDK. Before we look at how to set our own skin the following screenshot shows how the default cross platform Java look and feel (Metal) displays using a simple frame on my Windows 7 system.

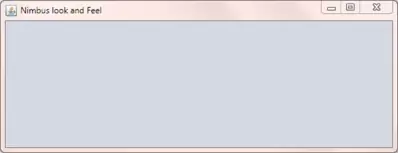
The following program sets the look and feel to Nimbus which is the other platform independent look and feel.
import javax.swing.JFrame; // An interactive window
import javax.swing.UIManager;

public class SetLookAndFeel {

    public static void main (String[] args) {
        // SetJava look and feel class
        try {
            UIManager.setLookAndFeel("javax.swing.plaf.nimbus.NimbusLookAndFeel");
        } catch(Exception e) {
            System.err.println(e + " exception occurred setting look and feel.");
        }

        // Simple frame to highlight look and feel
        JFrame simpleWindow = new JFrame("Nimbus look and Feel");
        simpleWindow.setBounds(100, 100, 568, 218);
        simpleWindow.setDefaultCloseOperation(JFrame.EXIT_ON_CLOSE);
        simpleWindow.setVisible(true);
    }
}
The following screenshot shows the results of running the SetLookAndFeel class on my Windows 7 system. We will discuss frames in the next lesson so we can skip over the code to create the window
for now. To set the nimbus look and feel we are just passing a string of the classname to the UIManager.setLookAndFeel static method. The call can throw a ClassNotFoundException
so we are wrapping the code in a try catch block.

The results may look slightly different on your computer but these look and feel classes are cross platform, come with the SDK and are guaranteed to work on any platform. You can try and use the other look and feel classes on your own computer and see what results you get.
Lesson 2 Complete
In this lesson we introduced the AWT and Swing libraries with an overview of those parts of these libraries we are interested in to create our own GUIs within java.
What's Next?
In the next lesson we look at the javax.swing.JFrame top-level container class, adding depth to frames using panes and the javax.swing.JPanel background container class.