Constructor BasicsS2C Home « Constructor Basics
In this lesson we take a basic look at constructors, which are used to create instances of our classes.
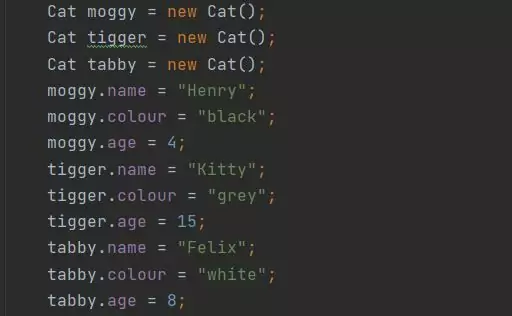
In the last two lessons we looked at instance variables and how we use them to populate our objects. We created three Cat objects using the new keyword to create our instances and then used quite a few
lines of code to create state for each object. Part of the TestCat4 test class is shown below:

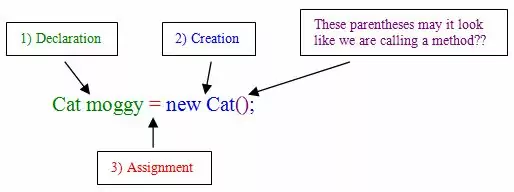
TestCat4 test class.This approach to creating state within our objects is not only long winded but prone to error. There is also another thing I am sure you have been wondering about, each time we create an instance of an object we use parentheses after the name of the object we are instantiating. It looks like we are calling a method to create our object! Lets look at the steps in creating an object again:

Default Constructor Top
So what is going on here? It sure looks like we are calling a method called Cat(). Well actually we're calling the Cat constructor, which has the code that runs when you instantiate an object by using
the new keyword followed by a class name. I know what you're thinking, we haven't written any constructor for our Cat class, so what is going on here? Well if we don't write our own constructor, our
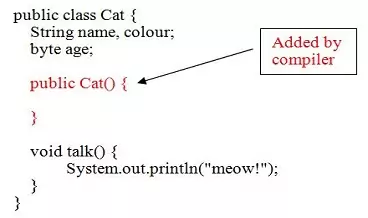
friendly compiler writes a default constructor for us. The default constructor always follows the same pattern, which is the public access modifier followed by the class name and empty parentheses. So for
our Cat class the compiler added the following code:

This looks like a method but there's something missing, the return type which is mandatory for a method. So, if we don't write our own constructor then the compiler will insert a no arguments constructor into our code
for us, which is how we have been able to construct instances of our Cat class so far.
Coding Our Own Constructors Top
Lets code our own constructor for our Cat class and use it to create state within some Cat objects. To do this we are going to amend our existing Cat class and then write a new test class
to ensure it all works.
package com.server2client;
/*
  A Cat Class
*/
public class Cat {
    String name, colour;
    int age;
    /*
      Below is the new constructor for our Cat Class
    */
    public Cat(String a, String b, int c) {
        name = a;
        colour = b;
        age = c;
    }

    void talk() {
        System.out.println("meow!");
    }
}
Save and compile our amended Cat class in directory c:\_ObjectsAndClasses in the usual way.
What we have done is create a new constructor for our Cat class (notice there is no return type). The constructor has three parameters for the name, age and colour of the cat. Inside the constructor we
assign the parameters to our Cat instance variables. Now lets test our new Cat class:
package com.server2client;
/*
  Test Class5 for Cat
*/
public class TestCat5 {

    public static void main (String[] args) {
        Cat moggy = new Cat("Henry", "black", 4);   // Call new Cat constructor with three arguments
        Cat tigger = new Cat("Kitty", "black", 15); // Call new Cat constructor with three arguments
        Cat tabby = new Cat("Felix", "white", 8);   // Call new Cat constructor with three arguments
        System.out.println("Our " + moggy.colour + " cat called " + moggy.name + " is " + moggy.age);
        System.out.println("Our " + tigger.colour + " cat called " + tigger.name + " is "
                                  + tigger.age);
        System.out.println("Our " + tabby.colour + " cat called " + tabby.name + " is " + tabby.age);
    }
}

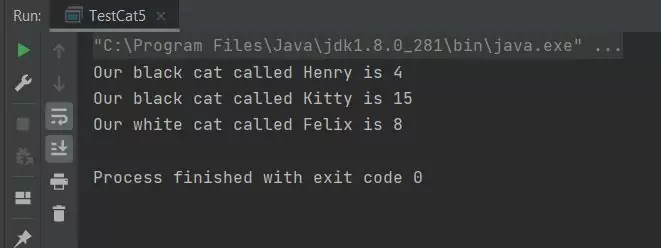
TestCat5 class.The above screenshot shows the output of running our TestCat5 class. As you can see creating instances is a lot more succinct and less error prone.
Related Quiz
Objects & Classes Quiz 10 - Constructor Basics
Lesson 10 Complete
In this lesson we learnt about constructors, which we can use to instantiate objects of our classes.
What's Next?
In the next lesson we learn constructor overloading and how to use the this keyword.