Quiz NavigationS2C Home « Quiz Navigation
In this lesson we will create navigation for our interactive quiz using JavaScript and jQuery so we can traverse backwards and forwards through the quiz questions.
Action List Revisited
The action points we will address in this lesson are highlighted in red, those already processed are greyed out.
- A container to hold the questions and multiple choice answers.
- A way to present the questions and possible answers to a question one at a time.
- A way to allow the user to select only one of multiple answers to a question.
- Visible markers for navigating the quiz questions.
- A way to navigate backwards and forwards through each question using the visible markers.
- A container to hold the progress bar.
- A way to update the progress bar as we work through the quiz.
- We have to store the user's answers somewhere for checking when the quiz is completed.
- A list of correct answers to check the user's answers against.
- A results container for user feedback.
- A summary of right and wrong answers to display within the results container when the quiz has completed.
- A score to show the user when the quiz has completed.
Deciphering Our Highlighted Action Points
Ok, let's go through action points 5, 7 and 9 and sort out the navigation, progress and correct answers from these.
5) A way to navigate backwards and forwards through each question using the visible markers.
We already created visible markers using links with some styling in the Quiz Layout lesson. We will use jQuery to select these elements when clicked and either move to the previous question, next question or end the quiz dependant upon the class of the link clicked by the user. We will use some jQuery fade effects to fade out the old question container and fade in the new one.
7) A way to update the progress bar as we work through the quiz.
We can update the progress bar as we navigate backwards and forwards through each question using JavaScript and jQuery, in fact we can tie this processing in with point 5 above.
9) A list of correct answers to check the user's answers against.
We can use a JavaScript array to store the quiz answers in and to keep the quiz and learning simple we will hardcode the answers.
Creating A Folder For Our JavaScript Files
We can now create some JavaScript and jQuery for our quiz based on our analysis of the action points for this lesson. First of all make sure you are pointing to the C:\_CaseStudy folder by double clicking the icon for it.
right click the mouse in the window
from the drop down menu select New
click the Folder option and call the folder js and press enter.
Ok, the first thing we need to do is download the latest version of jQuery from the jQuery site. At the time of writing, the current release is version 3.5.1 and is the release used in this case study.
You have the choice of a minified version, which has a file size of just 88 kilobytes which we will be using for the lessons and can be used for your production code. Other versions include an uncompressed version which has a file size of 281 kilobytes and can be used in development and investigated to see how jQuery works and a slim version, which has a file size of just 71 kilobytes which excludes the ajax and effects modules and can be used for your production code if you don't require these two modules (which we do!). Right-click the link you require and select "Save Link As..." from the menu to save the file of your choice.
Once you have downloaded jQuery copy the file to the C:\_CaseStudy\js folder we created above.
The following code snippet is used in our examples for importing the minified version of jQuery into a HTML file and assumes the file exists in the current directory. If you didn't download this version then you need to change the information accordingly.
<script type="text/javascript" src="js/jquery-3.5.1.min.js"></script>
Ok, with Notepad or a similar text editor open, copy and paste the following code into the editor.
// JavaScript and jQuery for interactive quiz follows
$(function(){
  // highlight question row on mouseover
  $('.answers label').css({display:'block',width:'712'});
  $('.answers label').mouseover(function(){$(this).css({backgroundColor:'yellow'});});
  $('.answers label').mouseleave(function(){$(this).css({backgroundColor:'#fff'});});

  var S2CQuiz = {
    init: function(){
        // next question
        $('.btnNext').on('click', function(){
            // Make sure a radio box has been checked
            if ($('input[type=radio]:checked:visible').length == 0) {
                $('.errMsg').show().fadeOut(1200);
                return false;
            }
            $(this).parents('.questionContainer').fadeOut(500, function(){
                $(this).next().fadeIn(500);
            });
            var progBar = $('#progress');
            progBar.width(progBar.width() + 240 + 'px');
        });
        // previous question
        $('.btnPrev').on('click', function(){
            $(this).parents('.questionContainer').fadeOut(500, function(){
                $(this).prev().fadeIn(500);
            });
            var progBar = $('#progress');
            progBar.width(progBar.width() - 240 + 'px');
        });
        // last question
        $('.btnShowResult').on('click', function(){
            // Make sure a radio box has been checked
            if ($('input[type=radio]:checked:visible').length == 0) {
                $('.errMsg').show().fadeOut(1200);
                return false;
            }
            $('#progress').width(0);
            $('#progressContainer').hide();
            $('.txtStatusBar').text('Quiz Result');
            var resultSet = '<div class="totalScore">You scored ' + 0 + '/' +  3 + '</div>';
            $('#resultContainer').html(resultSet).show();
        });
    },
    answers: { q1: 'c', q2: 'b', q3: 'b' }
  };
  S2CQuiz.init();

  // highlight question row on mouseover
  $('.answers label').css({display:'block',width:'100%'});
  $('.answers label').mouseover(function(){$(this).css({backgroundColor:'#36648B'});});
  $('.answers label').mouseover(function(){$(this).css({color:'white'});});
  $('.answers label').mouseleave(function(){$(this).css({backgroundColor:'#fff'});});
  $('.answers label').mouseleave(function(){$(this).css({color:'#000'});});
});
Click file from the toolbar and then click the save option.
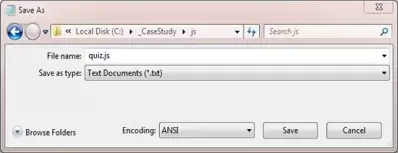
In the Save in: tab at the top make sure you are pointing to the C:\_CaseStudy\js folder we created above.
In the File name: text area type quiz.js and then click the Save button and close the Notepad.

The .js file extension lets the system know that this is a JaavScript document, you must save the file with this extension so your default web browser knows what the file is for.
Reviewing The JavaScript and jQuery
We have tied our HTML quiz elements into a jQuery .ready() function that is fired after the document is fully parsed and converted into the DOM tree. Within
the function we handle the visible markers the user sees for the next and previous quiz questions as well as a marker that is using a different class for the final quiz question. We use the jQuery
.on() event handler method to check for user clicks happening on these markers. The first thing we do if the user clicks the .btnNext
or .btnShowResult links is ensure that a radio button has been pressed. If true we can display the next question or end the quiz, otherwise we output a message. This way we can ensure all questions
for the quiz have been answered. We don't need to do this when the .btnPrev has been clicked and can just display the previous question container.
We use the jQuery .parents() and either the .next() or
.prev() traversal methods in conjunction with the .fadeIn() and
.fadeOut() effects methods to give a nice effect for hiding and showing the quiz questions.
Updating the progress bar is done dependant upon the user going forwards or backwards thought the quiz questions and so we do this after displaying the relevant question. We use the jQuery
.width() properties method to achieve this.
For now when the user presses the .btnShowResult link we are hiding the progress bar and showing the results container with some hardcoded results. We will rectify this in the next lesson.
Updating Our Layout
Using Notepad or a simlilar text editor, reopen the global.css we created in Lesson 2: Quiz Layout.
We only need to add the CSS for our error message, so copy and paste the following CSS to the end of the existing file.
/* Error message */
.errMsg {
  color:red;
  margin:5px 10px;
}
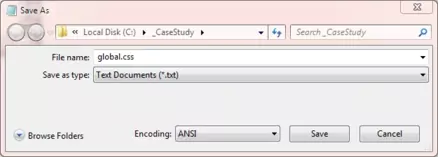
Save the file in the C:\_CaseStudy folder and close the Notepad.

Viewing Our Changes
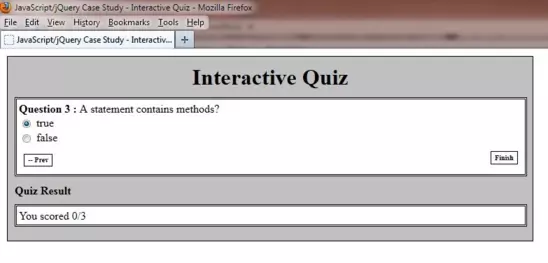
From the C:\_CaseStudy folder, double click on the index.html saved file and it will appear in your default web browser. Try navigating forwards through the quiz and you will see
you are prompted to answer the current question before you can do this. Navigate backwards and forwards and see how the progress bar gets updated. Once you see this all working press the
.btnShowResult link and you see see a screenshot similar to the following:

Lesson 4 Complete
In this lesson we created navigation and a progress bar for our interactive quiz using JavaScript and jQuery.
Related Tutorials
JavaScript Basic Tutorials - Lesson 5 - Variables
JavaScript Intermediate Tutorials - Lesson 1 - Arrays
JavaScript Intermediate Tutorials - Lesson 3 - Conditional Statements
jQuery Basic Tutorials - Lesson 6 - Tree Traversal
jQuery Basic Tutorials - Lesson 11 - Working With Dimension & Position CSS Properties
jQuery Intermediate Tutorials - Lesson 7 - Fading & Sliding Effects
jQuery Advanced Tutorials - Lesson 1 - Browser & Loading Events
jQuery Advanced Tutorials - Lesson 4 - Event Handler Attachments
What's Next?
In the next lesson we finish off our action points by giving the user feedback on how they did in the quiz.