Project SetupS2C Home « Project Setup
In this lesson we complete certain tasks to set up our project infrastructure for use in the later lessons of the case study. This will make creation of other components of the case study easier and ensure easier deployment at the end of the project.
The tasks required to complete project setup are :-
- Adding the file structure for the project
- Downloading JSTL
- Downloading the MySQL RDBMS for use in our persistence layer
- Downloading the MySQL JDBC Connector
- Creating a boot sale database
- Creation of boot sale tables for stock items, diary, location and registered users
- Adding a deployment descriptor for use by the web application
- Update
tomcat-usersfile
Create Project File StructureTop
The first thing we need to do is create our project file structure to hold our components. This will include static and dynamic web pages, css, any external jar libraries, a deployment descriptor and Java source and class files folders required for the Case Study.
Lets create a folder for our Case Study files, in Windows this would be:
double click My Computer icon
double click C:\ drive (or whatever your local drive is)
right click the mouse in the window
from the drop down menu select New
click the Folder option and call the folder _ServletsJSP_Case_Study and press enter.
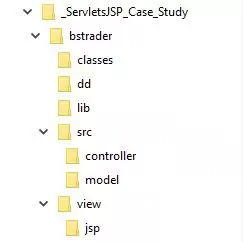
Within the _ServletsJSP_Case_Study folder we will create a folder for our web application called bstrader.
Within the bstrader folder we will create separate folders to hold our DD, source files and our compiled byte code and these will be called view, dd, lib, src and classes.
Within the src folder create subfolders called model and controller.
Once done our directory sturcture should tie in nicely with the diagram from the Our First Servlet - Development Environment section of the site. The only difference is that we are going to put our JSP files into their own folder so we can move these across en-masse and store them along with the view and controller parts of our design within the WEB-INF folder.
This is a more modern approach to the MVC paradigm and is often referred to as MVC-2. The advantage of this deployment is that our dynamic JSP pages will now be secure within the WEB-INF folder when we deploy them and cannot be altered.
So after creating these folders your directory structure should look something like the following screenshot:
That's all we need to do as far as setting up the folder packages for the project goes.
Downloading JSTLTop
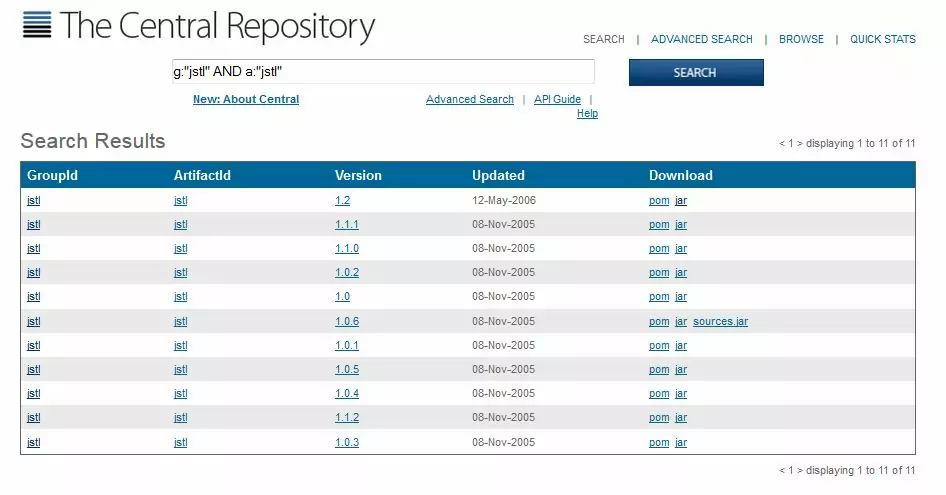
The following link will take you to the download page for the Bundled JSTL API and JSTL Implementation where you can download the jstl-1.2.jar JAR, JSP Standard Tag Library.
Clicking on the the JSTL version within the Maven repository allows you to download the JAR.
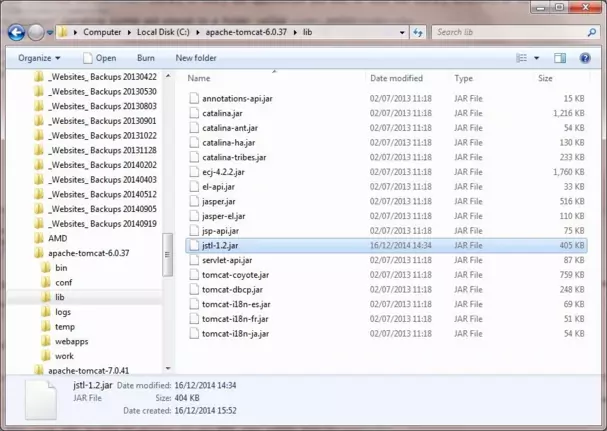
The JAR must be copied into the WEB-INF/lib library of every web application that requires JSTL, or into the library directory of the container you're using, to allow JSTL for everything; for my Tomcat installation this is C:\apache-tomcat-6.0.37\lib
The following screenshot shows the JAR needed on my Windows7 operating system and placed in the C:\apache-tomcat-6.0.37\lib folder. This makes JSTL accessible by all JSP pages which may or may not be the way you choose to allocate the resource.
For the purposes of the case study move the JSTL jar file into your _ServletsJSP_Case_Study\bstrader\lib folder.
Downloading MySQL RDBMSTop
You can download the latest version of the MySQL database here.
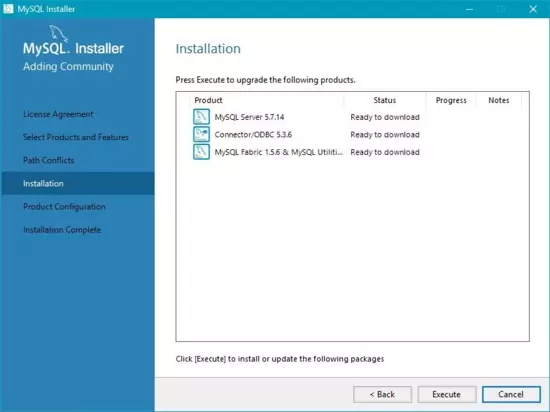
I used the MySQL Community Server download for Windows 10 64bit, but just download the appropriate software for your platform. On my windows system this is a hefty download so make sure you have enough disk space available for your platform. The following image shows the applications I installed and I also downloaded the MySQL workbench to make schema and table creation easier.
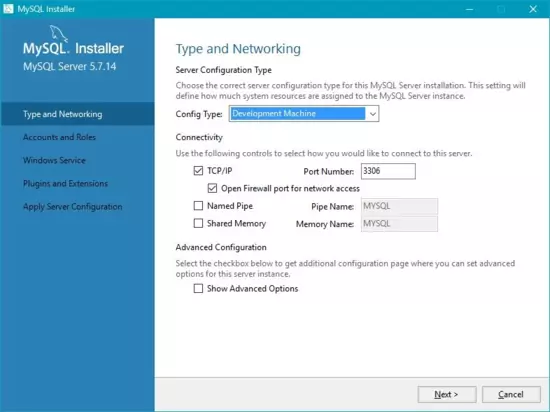
I used the defualt settings for the type and networking as follows.
For the accounts and roles I used the defaults and just entered a password and username of 'root' as this is what is coded in my java classes.
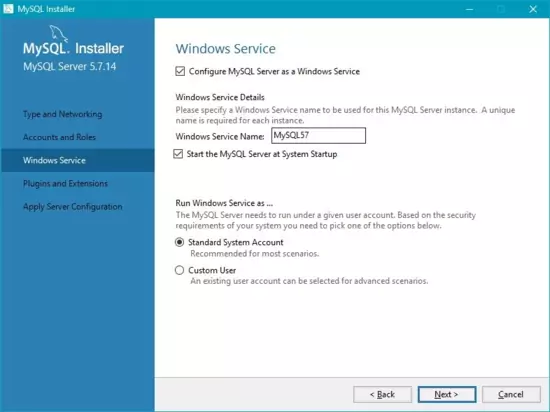
I used the default settings for windows service as follows.
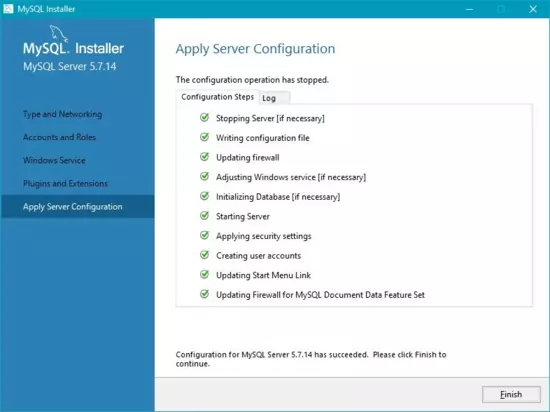
Then just press next and execute and hopefully your MySQL installation is complete as shown in the following screenshot.
Create MySQL DatabaseTop
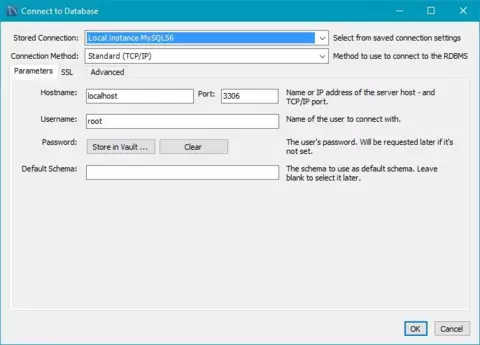
After downloading MySQL workbench start the application and Select the Database option from the top and then the Connect to Database... option and then type in your password and press OK as shown in the following screenshot.
Cut and paste the following sql into the MySQL query editor.
CREATE DATABASE `bootsale` /*!40100 DEFAULT CHARACTER SET utf8 */;
CREATE TABLE `bootsalediary` (
  `date` varchar(10) NOT NULL,
  `name` varchar(30) NOT NULL,
  PRIMARY KEY (`date`)
) ENGINE=InnoDB DEFAULT CHARSET=utf8;
CREATE TABLE `bootsalelocation` (
  `name` varchar(30) NOT NULL,
  `address1` varchar(30) NOT NULL,
  `address2` varchar(30) NOT NULL,
  `address3` varchar(30) DEFAULT NULL,
  `address4` varchar(30) DEFAULT NULL,
  `postcode` varchar(8) NOT NULL,
  PRIMARY KEY (`name`)
) ENGINE=InnoDB DEFAULT CHARSET=utf8;
CREATE TABLE `registereduser` (
  `email` varchar(40) NOT NULL,
  `forename` varchar(30) NOT NULL,
  `surname` varchar(30) NOT NULL,
  `housenameorno` varchar(30) NOT NULL,
  `street` varchar(30) NOT NULL,
  `town` varchar(30) NOT NULL,
  `county` varchar(30) NOT NULL,
  `postcode` varchar(8) NOT NULL,
  PRIMARY KEY (`email`)
) ENGINE=InnoDB DEFAULT CHARSET=utf8;
CREATE TABLE `stockitem` (
  `stockname` varchar(30) NOT NULL,
  `stockitemcategory` varchar(30) NOT NULL,
  `stockitemdescription` varchar(30) NOT NULL,
  `stockprice` int(11) NOT NULL,
  `stocklevel` int(11) NOT NULL,
  `stockreorderlevel` int(11) NOT NULL,
  `stocksoldlastbootsale` int(11) NOT NULL,
  `customername` varchar(30) DEFAULT NULL,
  `feedbacktext` varchar(45) DEFAULT NULL,
  `feedbackrating` varchar(15) DEFAULT NULL,
  PRIMARY KEY (`stockname`)
) ENGINE=InnoDB DEFAULT CHARSET=utf8;
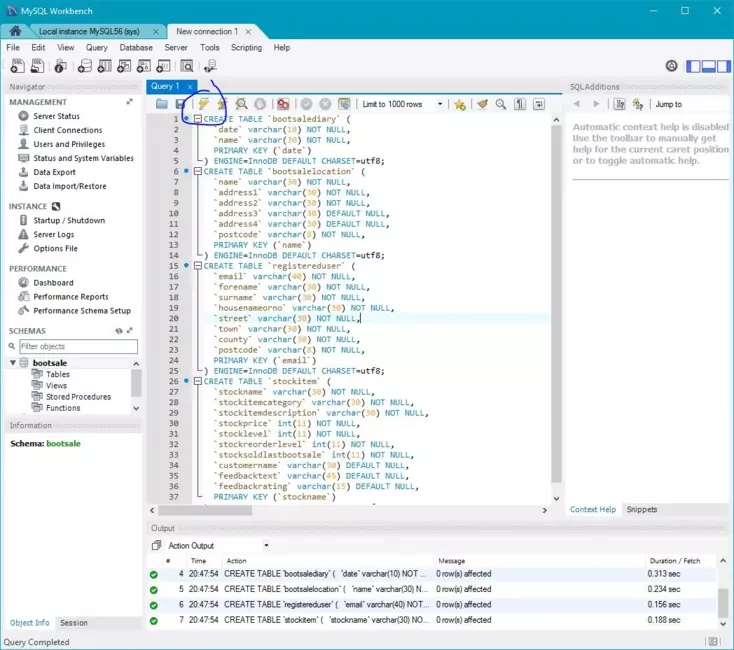
Execute the above sql by pressing the lightning bolt as shown below. If you get errors creating the tables, just select the bootsale database schema you created with the first line of the script and make this the default schema. After this remove this line and run the rest of the script to create the tables.
Downloading JDBC ConnectorTop
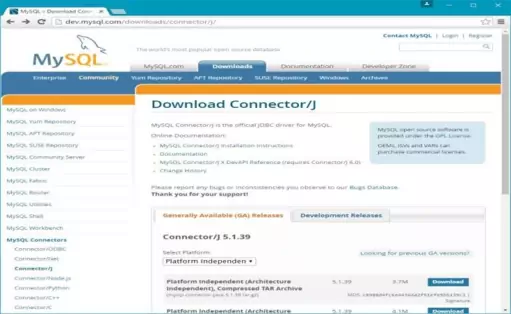
As we are using JDBC to connect the MySQL database with our sql statements we need a JDBC connector for this and the one we use use for MySQL is Connector/J
The following screenshot shows the above link; just pick the connector for your OS.
Once you have downloaded the JDBC Connector move the jar file into your _ServletsJSP_Case_Study\bstrader\lib folder.
Create Deployment DescriptorTop
The penultimate thing we need to do for our project setup is to create a deployment descriptor.
Cut and paste the following code into your text editor and save it in the c:\_ServletsJSP_Case_Study\bstrader\dd directory as web.xml.
Make sure you change the context-param settings for SMTP and other email values from xxxxx to your details.
<?xml version="1.0" encoding="UTF-8"?>
<web-app xsi:schemaLocation="http://java.sun.com/xml/ns/javaee
                             http://java.sun.com/xml/ns/javaee/web-app_2_5.xsd"
         xmlns:xsi="http://www.w3.org/2001/XMLSchema-instance"
         xmlns="http://java.sun.com/xml/ns/javaee" version="2.5">
   <welcome-file-list>
      <welcome-file>home.html</welcome-file>
   </welcome-file-list>
   <servlet>
      <servlet-name>trader</servlet-name>
      <servlet-class>controller.Signin</servlet-class>
   </servlet>
   <servlet>
      <servlet-name>facilities</servlet-name>
      <servlet-class>controller.TraderFacilities</servlet-class>
   </servlet>
   <servlet>
      <servlet-name>custfacilities</servlet-name>
      <servlet-class>controller.CustomerFacilities</servlet-class>
   </servlet>
   <servlet>
      <servlet-name>process</servlet-name>
      <servlet-class>controller.TraderProcessInput</servlet-class>
   </servlet>
   <servlet>
      <servlet-name>custprocess</servlet-name>
      <servlet-class>controller.CustomerProcessInput</servlet-class>
   </servlet>
   <servlet>
      <servlet-name>emails</servlet-name>
      <servlet-class>controller.SendEmails</servlet-class>
   </servlet>
   <servlet>
      <servlet-name>jsp</servlet-name>
      <servlet-class>org.apache.jasper.servlet.JspServlet</servlet-class>
   </servlet>
   <servlet-mapping>
      <servlet-name>trader</servlet-name>
      <url-pattern>/tradersignin</url-pattern>
   </servlet-mapping>
   <servlet-mapping>
      <servlet-name>facilities</servlet-name>
      <url-pattern>/traderfacilities</url-pattern>
   </servlet-mapping>
   <servlet-mapping>
      <servlet-name>custfacilities</servlet-name>
      <url-pattern>/customerfacilities</url-pattern>
   </servlet-mapping>
   <servlet-mapping>
      <servlet-name>process</servlet-name>
      <url-pattern>/processinput</url-pattern>
   </servlet-mapping>
   <servlet-mapping>
      <servlet-name>custprocess</servlet-name>
      <url-pattern>/customerprocessinput</url-pattern>
   </servlet-mapping>
   <servlet-mapping>
      <servlet-name>emails</servlet-name>
      <url-pattern>/sendemails</url-pattern>
   </servlet-mapping>
   <servlet-mapping>
      <servlet-name>jsp</servlet-name>
      <url-pattern>/bstrader/WEB-INF/jsp/*</url-pattern>
   </servlet-mapping>

   <!-- SMTP settings -->
   <context-param>
    <param-name>host</param-name>
    <param-value>smtp.xxxxx</param-value>
   </context-param>

   <context-param>
    <param-name>port</param-name>
    <param-value>25</param-value>
   </context-param>

   <context-param>
    <param-name>user</param-name>
    <param-value>xxxxx@xxxxx</param-value>
   </context-param>

   <context-param>
    <param-name>pass</param-name>
    <param-value>xxxxx</param-value>
   </context-param>

   <security-constraint>
      <web-resource-collection>
         <web-resource-name>ViewFacilities</web-resource-name>
         <url-pattern>/traderfacilities</url-pattern>
         <http-method>GET</http-method>
      </web-resource-collection>

      <auth-constraint>
         <role-name>role1</role-name>
      </auth-constraint>
   </security-constraint>

   <security-role>
      <role-name>role1</role-name>
   </security-role>

   <login-config>
      <auth-method>FORM</auth-method>
      <form-login-config>
         <form-login-page>/trader_signin.html</form-login-page>
         <form-error-page>/trader_signin_error.html</form-error-page>
      </form-login-config>
   </login-config>
</web-app>
Update Tomcat UsersTop
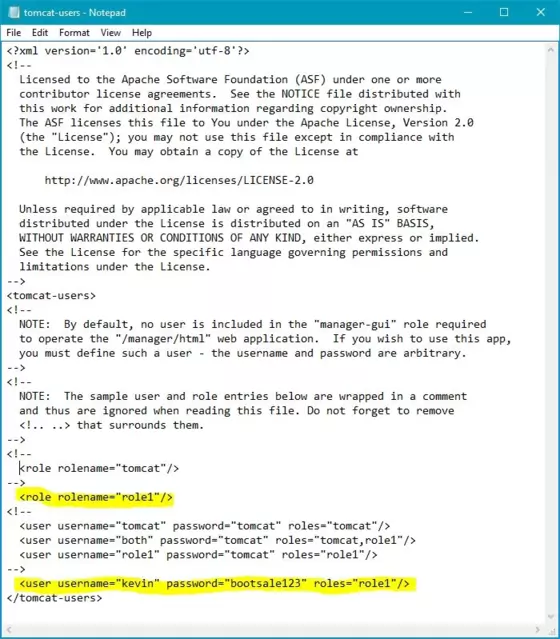
The last thing we need to do for our project setup is to create a new username and password in the tomcat-users file within the C:\apache-tomcat-6.0.37\conf folder or wherever you downloaded tomcat to.
So go into the tomcat-users file, comment out all role and user entries and add the following instead :-
<role rolename="role1"/>
  <user username="kevin" password="bootsale123" roles="role1"/>
You could have just added this to the existing role and user entries but that would mean that authentication can be obtained via the role with a rolename of tomcat as well. Just remember that by commenting out the tomcat role and username earlier lessons on authentication using these values will no longer work. The point here is to learn how the roles and users affect authentication :)
The following screenshot shows the new user with a username of kevin and a password of bootsale123 being used by role1. The other role and user entries have been commented out.
Lesson 2 Complete
In this lesson we set up the folders for the Java Servlet and JavaServer Pages case study, downloaded MySQL and created the bootsale database and tables. We also created the deployment descriptor and updated the tomcat-users file with a new username and password.
What's Next?
In the next lesson we take a first look at the model part of the MVC paradigm and code the model component for the trader.