Wrap Up - DocumentationS2C Home « Wrap Up - Documentation
In our final lesson of the case study we wrap all our files up neatly in a JAR file so we can easily distribute them and to also show usage of the -jar command.
Bundling Our ApplicationsTop
We can bundle up applications we write for easy distribution and installation using WAR and JAR files. WAR is an acronym for Web Archive, is not part of the
java certification and is beyond the scope of these tutorials. JAR is an acronym for Java Archive and is part of the java certification and will also be discussed here.
Creating A Manifest.mf FileTop
Before we create a JAR file we will need to create a manifest file. A manifest file is used by the JVM to load the correct class when we come to run our application from a
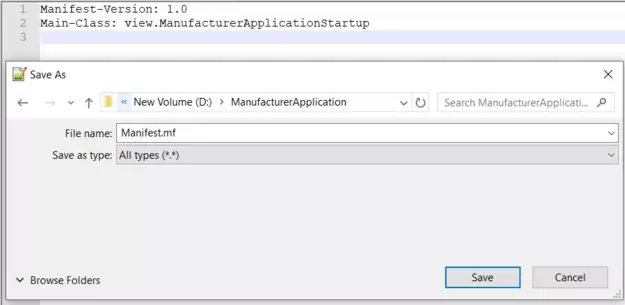
JAR. Open your text editor and cut and paste the following lines into it. Name the file Manifest.mf and save it in the c:\_Case_Study directory.
Manifest-Version: 1.0
Main-Class: client.ManufacturerApplicationStartup
Warning:The text file must end with a new line or carriage return, as the last line which in our example is
Main-Class: client.ManufacturerApplicationStartup
will not be parsed properly if it does not end with a new line or carriage return.
The following screenshot shows the contents of the Manifest.mf file saved into the c:\_Case_Study directory.
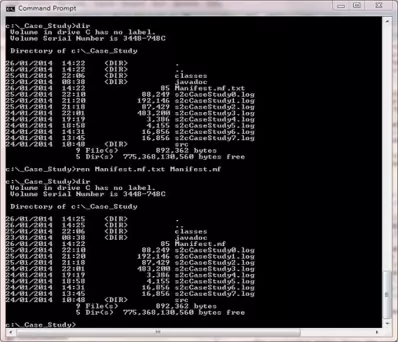
If your saved manifest.mf file has been suffixed with a .txt extension as shown in the following screenshot just use the ren option to rename it correctly.
Creating A JAR FileTop
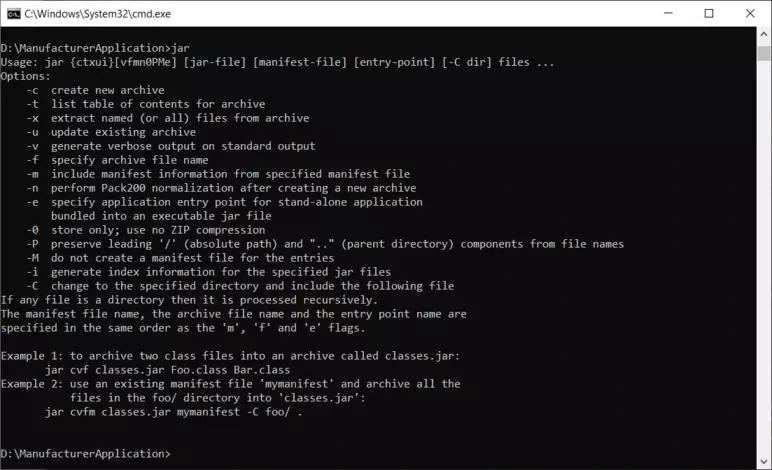
The following screenshot shows the jar command which gives us quite a few options for archiving our applications and classes into a JAR file. The most commonly used options are
c, v, f and m which can be specified in any order you like. The main thing to remember when using the jar command options is that the
actual values you enter must correalate with the order in which the options are entered.
When we create our JAR file we will need to include the location and name of the manifest file we created. The following command typed from within the c:\_Case_Study
directory will create a JAR file called manufacturer.jar containing our packaged classes. Make sure you include the period at the end.
jar -cvfm manufacturer.jar Manifest.mf -C classes .
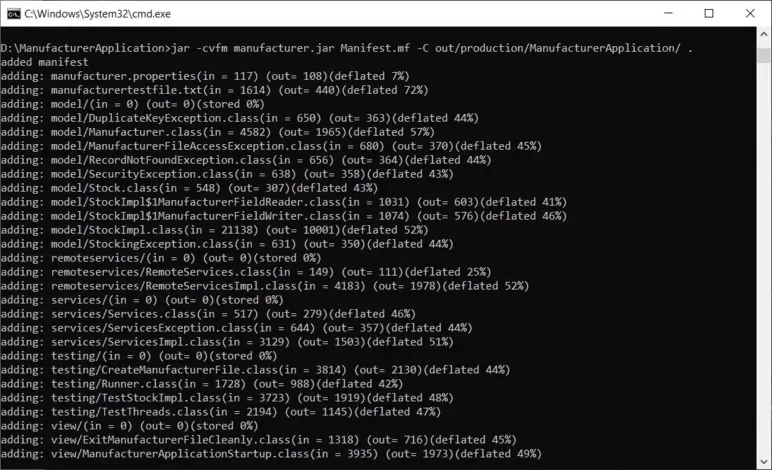
The screenshot below shows the JAR file named manufacturer.jar being created using the options specified.
Running Our JAR FileTop
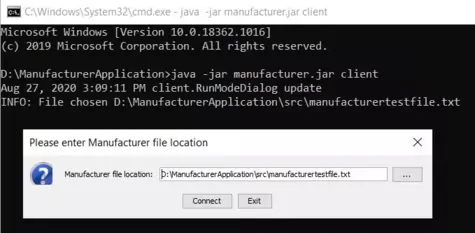
We can run our JAR file in the usual way using the java option and specifying the -jar command, the name of the JAR file, followed by any command line arguments.
Because the complete Manufacturer application is packaged within the JAR file we can run the JAR file from anywhere on our machine using an absolute path:
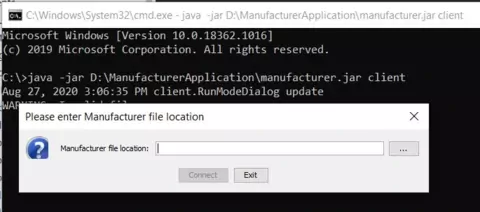
Or by just using a relative path from the directory the JAR file resides in as shown by the following screenshot:
What's Next?
That's it for the Java case study. The next case study focuses on Servlets & JSP.